Stargazing unveils the cosmos, offering a captivating journey through celestial wonders and a deeper understanding of our universe’s vastness.
Embarking on this hobby fosters curiosity, patience, and a profound connection with the night sky, enriching life with awe-inspiring discoveries.
What is Stargazing?
Stargazing, at its core, is the observation of celestial objects – stars, planets, nebulae, galaxies, and more – with the naked eye, binoculars, or telescopes. It’s a pursuit that has captivated humanity for millennia, evolving from ancient astronomical observations used for navigation and timekeeping to a modern hobby enjoyed by millions.
The practice ranges from casually identifying constellations to meticulously charting deep-sky objects. It’s about appreciating the beauty and immensity of the universe, and seeking to understand our place within it. Whether you’re a seasoned astronomer or a complete beginner, stargazing offers a unique opportunity to connect with something larger than yourself, fostering a sense of wonder and inspiring a lifelong quest for knowledge about the cosmos.
Why Stargazing is a Rewarding Hobby
Stargazing offers a unique blend of intellectual stimulation and peaceful contemplation. It encourages learning about astronomy, physics, and the history of science, expanding your understanding of the universe. The hobby cultivates patience and observational skills, as locating and identifying celestial objects requires focus and persistence.
Beyond the educational benefits, stargazing provides a profound sense of connection to the cosmos, offering a humbling perspective on our place in the grand scheme of things. It’s an escape from the stresses of daily life, a chance to disconnect from technology and reconnect with nature, and a source of endless wonder and inspiration.
Essential Equipment for Beginners
Starting your astronomical journey requires minimal gear: a telescope, eyepieces, and star charts are fundamental tools for exploring the night sky.
Telescopes: Types and Considerations
Choosing a telescope can feel daunting, as various types cater to different observing needs and budgets. Refractor telescopes utilize lenses, offering sharp images but can be pricier for larger apertures. Reflector telescopes employ mirrors, providing excellent light-gathering capabilities at a more affordable cost. Catadioptric telescopes combine lenses and mirrors, resulting in compact designs with good performance.
For beginners, aperture – the diameter of the primary lens or mirror – is paramount. Larger apertures gather more light, revealing fainter objects. Consider portability, ease of assembly, and the type of celestial objects you wish to observe. A sturdy mount is crucial for stable viewing, preventing shaky images. Researching different models and reading reviews will help you make an informed decision.
Dobsonian Telescopes: A Beginner-Friendly Choice
Dobsonian telescopes represent an excellent entry point into astronomy, lauded for their simplicity, affordability, and impressive light-gathering ability. These Newtonian reflectors feature a large aperture housed within a straightforward, altazimuth mount – meaning it moves up/down and left/right. This design eliminates complex tracking mechanisms, reducing cost and setup time.
Their intuitive operation makes them ideal for beginners, allowing immediate focus on observing rather than wrestling with intricate controls. Dobsonians typically offer substantial aperture for the price, revealing stunning views of planets, nebulae, and galaxies. While not as portable as some designs, their performance and value make them a popular choice for aspiring astronomers seeking a rewarding observing experience.
Aperture: The Key to Light Gathering
Aperture, the diameter of a telescope’s primary mirror or lens, is arguably its most crucial specification. It dictates the telescope’s ability to collect light, directly impacting image brightness and detail. Larger apertures gather more light, revealing fainter deep-sky objects like galaxies and nebulae, and enhancing planetary views.
Generally, “bigger is better” applies to aperture, but it also increases telescope size and cost. A 6-8 inch (15-20 cm) aperture strikes a good balance for beginners, providing ample light-gathering power without being prohibitively expensive or cumbersome. Increasing aperture significantly improves resolution, allowing you to discern finer details in celestial objects, making it a fundamental consideration when selecting a telescope.
Eyepieces: Magnification and Selection
Eyepieces are interchangeable lenses that determine a telescope’s magnification. Magnification is calculated by dividing the telescope’s focal length by the eyepiece’s focal length. While higher magnification sounds appealing, it’s not always desirable; excessive magnification can result in a dim, blurry image, especially with smaller apertures or poor atmospheric conditions.

A versatile selection of eyepieces is essential. A low-power eyepiece provides a wide field of view, ideal for locating objects and observing larger nebulae. A medium-power eyepiece offers a balance between magnification and field of view, suitable for most observations. A high-power eyepiece is useful for detailed views of planets and the Moon. Kits containing several common focal lengths are a cost-effective starting point.
Understanding Eyepiece Magnification
Magnification isn’t the sole determinant of a satisfying viewing experience. While it enlarges the image, it also diminishes brightness and narrows the field of view. A good rule of thumb is to keep magnification within reasonable limits, typically 50x per inch of aperture. For example, a 6-inch telescope ideally shouldn’t exceed 300x magnification.
Atmospheric conditions significantly impact usable magnification. On nights with turbulent air (“seeing”), higher magnification will only result in a shaky, indistinct image. Lower power is preferable in such cases. Experimentation is key to finding the optimal magnification for each object and observing conditions. Remember, a clear, bright image at lower power is far more rewarding than a blurry, dim one at high power.
Recommended Eyepiece Kit
A versatile kit should include eyepieces covering a range of magnifications. A common starting point is a set with 4mm, 10mm, and 25mm eyepieces. These provide low, medium, and high magnification options, respectively, suitable for various celestial objects and observing conditions.
Plössl eyepieces are a popular choice due to their wide field of view and sharp images. Consider a kit with 1.25-inch barrels, as this is a standard size for many telescopes. Avoid extremely cheap eyepieces, as they often suffer from poor optical quality. Investing in a few good quality eyepieces will significantly enhance your observing experience, offering clearer and more detailed views of the cosmos.
Locating Celestial Objects
Navigating the night sky requires tools like star charts, planispheres, and smartphone apps to pinpoint planets, nebulae, and galaxies effectively.
Understanding Star Charts and Maps
Star charts and maps are fundamental tools for any aspiring astronomer, serving as roadmaps to the celestial sphere. These aren’t like geographical maps; instead, they depict the sky as you would see it from your location. They illustrate constellations, pinpoint bright stars, and mark the positions of planets and deep-sky objects.
Different types of charts exist, ranging from simple all-sky maps to detailed charts focusing on specific regions. Learning to read these charts involves understanding celestial coordinates – right ascension and declination – analogous to longitude and latitude on Earth. Many charts also indicate magnitude, representing a star’s brightness; lower numbers signify brighter stars. Practicing with a star chart alongside actual observations is key to mastering its use and successfully locating objects in the night sky.
Using a Planisphere
A planisphere, also known as a star wheel, is a rotating star chart ingeniously designed for a specific latitude. It allows you to dial in the date and time to display the visible stars and constellations for that moment. This circular tool consists of two overlapping discs: a star map and a rotating overlay with the months of the year and times of the night.
To use it, set your latitude, then rotate the overlay to match the current date and time; The visible portion of the star map then reveals what’s currently above the horizon. Planispheres are excellent for learning constellations and predicting when specific stars will rise or set, offering a hands-on, intuitive way to navigate the night sky.
Smartphone Apps for Stargazing
Modern stargazing is greatly enhanced by readily available smartphone applications. These apps utilize your phone’s GPS and sensors to identify celestial objects in real-time, simply by pointing your device at the sky. Popular options like SkyView Lite, Star Chart, and Stellarium Mobile offer augmented reality views, overlaying constellation lines and object names onto your camera’s live feed.
Beyond identification, these apps provide detailed information about planets, stars, and deep-sky objects. Many include features like red-light modes to preserve night vision, and the ability to plan observing sessions. They’re invaluable tools for beginners, offering a user-friendly and interactive way to learn the night sky.
Easy Targets for Beginner Astronomers
Beginner astronomers should start with bright planets like Jupiter, Saturn, Mars, and Venus, easily located and offering spectacular views through a telescope.
Planets: A Great Starting Point
Planets are ideal for beginner stargazers due to their brightness and relatively easy location in the night sky. They provide rewarding views even with modest telescopes, building confidence and observational skills.
Jupiter, a gas giant, showcases its iconic cloud bands and the Galilean moons – Io, Europa, Ganymede, and Callisto – appearing as tiny points of light orbiting the planet. Saturn is famed for its magnificent ring system, a breathtaking sight through any telescope.
Mars, the “Red Planet,” reveals surface features and polar ice caps during favorable oppositions. Venus, often called the “Evening/Morning Star,” displays phases similar to the Moon, a captivating spectacle. Practicing locating these planets hones your telescope skills for deeper sky objects.
Jupiter and its Moons
Jupiter, the solar system’s largest planet, is a stunning target for beginner astronomers. Even a small telescope reveals its prominent cloud bands – swirling patterns of ammonia crystals – and the Great Red Spot, a centuries-old storm larger than Earth.
However, the most captivating feature is often Jupiter’s four Galilean moons: Io, Europa, Ganymede, and Callisto. These moons appear as bright points of light, constantly changing positions as they orbit Jupiter. Observing their movements night after night demonstrates the dynamic nature of the solar system.
You can even witness these moons transit (pass in front of) Jupiter’s disk, or be eclipsed by its shadow – truly remarkable events visible with a modest telescope and patience.
Saturn and its Rings
Saturn, renowned for its spectacular ring system, is arguably the most visually striking planet in our solar system. Even a small telescope reveals these rings, appearing as a flattened, oval-shaped disk extending from either side of the planet.
The rings are composed of countless icy particles, ranging in size from dust grains to large boulders. Observing Saturn’s rings at different angles throughout its orbit provides a changing perspective on their structure and complexity.
Beyond the rings, you might also glimpse Titan, Saturn’s largest moon, appearing as a faint star-like object nearby. Saturn offers an unforgettable view, showcasing the beauty and wonder of the cosmos.
Mars: The Red Planet
Mars, easily identifiable by its reddish hue, presents a fascinating target for beginner astronomers. This coloration stems from iron oxide – rust – on its surface. Through a telescope, you may discern surface features, particularly during favorable oppositions when Mars is closest to Earth.
Look for the polar ice caps, which appear as bright, white patches. Larger telescopes can reveal darker areas representing maria, ancient volcanic plains. While detailed observation requires practice, even a modest telescope offers glimpses of this intriguing world.
Keep in mind that atmospheric conditions greatly impact visibility. Clear, steady skies are crucial for observing Martian details, making it a rewarding challenge for aspiring astronomers.
Venus: The Evening/Morning Star
Venus, often called the Evening or Morning Star due to its visibility around sunrise and sunset, is a brilliant object easily spotted with the naked eye. Through a telescope, however, its appearance changes dramatically depending on its phase, much like the Moon.
Because it orbits closer to the Sun than Earth, Venus exhibits phases – from crescent to gibbous – as its illuminated portion changes with its position relative to our planet. Observing these phases confirms that Venus orbits the Sun, not Earth;
Surface details are obscured by its thick, cloudy atmosphere, but patient observers may detect subtle shading. Venus is a captivating celestial sight, offering a dynamic view for beginner astronomers.
The Moon: Our Closest Celestial Neighbor
The Moon, our constant companion, is arguably the most accessible and rewarding target for beginner stargazers. Its phases – New, Crescent, Quarter, Gibbous, and Full – change throughout the month, offering diverse observing opportunities.
During different phases, lunar features become more or less prominent. The terminator, the line separating the illuminated and dark sides, is ideal for observing craters and mountains due to the long shadows they cast.
Even a small telescope reveals a wealth of detail, from vast maria (dark plains) to towering peaks. Observing the Moon is a fantastic way to hone your observing skills and appreciate the beauty of our solar system.
Lunar Phases and Features
Lunar phases are caused by the changing angles at which we view the Moon’s illuminated surface as it orbits Earth. From New Moon (invisible) to Full Moon (fully illuminated), each phase presents unique observing opportunities.
The Moon’s surface is marked by distinct features. Maria are large, dark, basaltic plains formed by ancient volcanic eruptions. Highlands are brighter, heavily cratered regions representing the Moon’s original crust.
Craters, formed by impacts, are ubiquitous and vary in size and age. Observing these features reveals the Moon’s dynamic history and provides a captivating visual experience for astronomers of all levels.
Observing Lunar Craters

Observing lunar craters requires a stable telescope and moderate magnification. Start with prominent craters like Tycho, Copernicus, and Ptolemaeus, easily identifiable due to their bright rays and central peaks.
Shadows cast by crater walls are most dramatic near the terminator – the line separating the illuminated and dark sides of the Moon. This enhances crater visibility and reveals intricate details.
Higher magnification reveals smaller craters and subtle features within larger ones. Atmospheric conditions significantly impact clarity; stable air yields sharper views. Sketching craters aids observation and memory retention, deepening your understanding of lunar geology.
Deep-Sky Objects: Beyond the Planets
Venture beyond planets to explore nebulae, galaxies, and star clusters—faint, distant wonders requiring darker skies and larger telescopes for rewarding views.
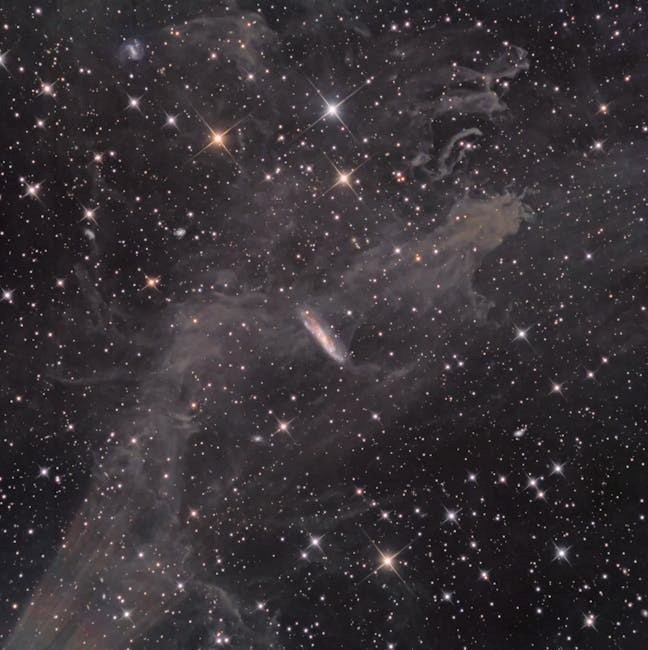
Nebulae: Clouds of Gas and Dust
Nebulae are interstellar clouds of gas and dust, often appearing as faint, diffuse patches of light in the night sky. These cosmic nurseries are where stars are born, and they come in various forms, each with unique characteristics. Emission nebulae, like the Orion Nebula, glow due to ionized gases energized by nearby stars.
Reflection nebulae scatter light from nearby stars, appearing blueish. Dark nebulae, conversely, block light from objects behind them, creating silhouettes against brighter backgrounds. Observing nebulae often requires longer exposure times with telescopes, or astrophotography techniques to capture their faint light. They represent some of the most beautiful and dynamic objects in the universe, showcasing the ongoing cycle of stellar birth and death.
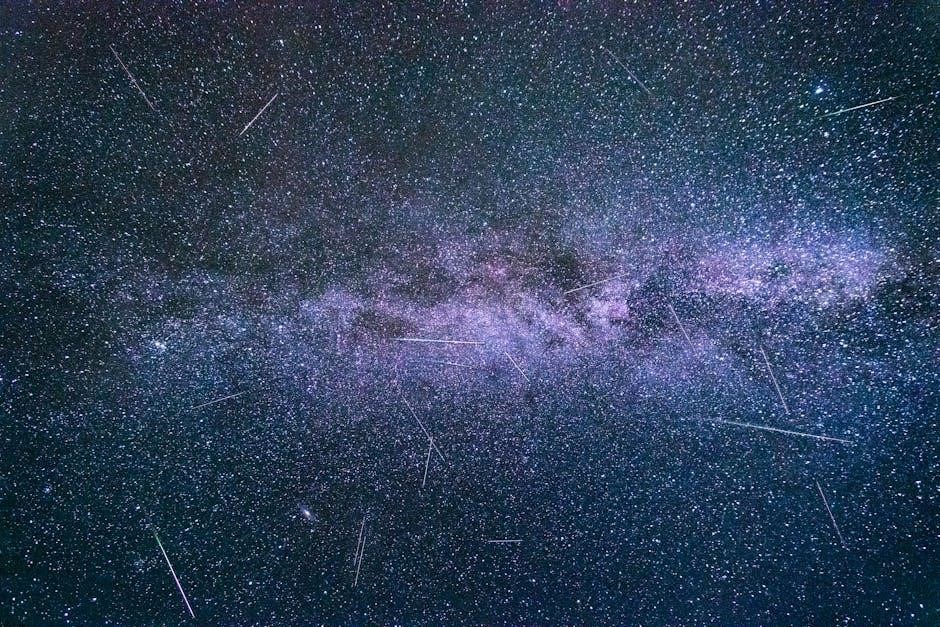
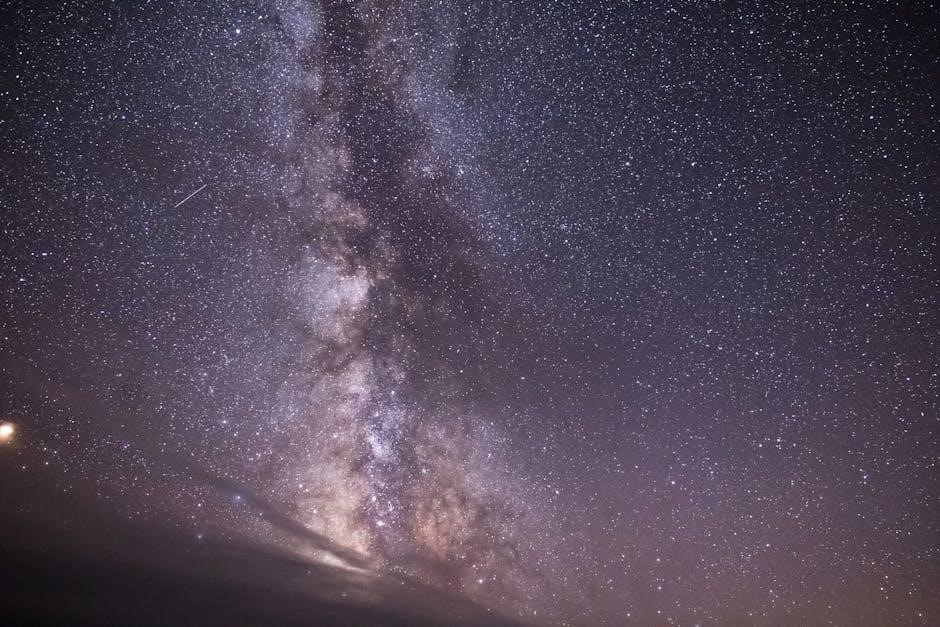
Galaxies: Island Universes
Galaxies are vast, gravitationally bound systems of stars, gas, dust, and dark matter, often referred to as “island universes.” Our own Milky Way is a spiral galaxy, but galaxies come in various shapes, including elliptical and irregular forms. Observing galaxies requires dark skies and often larger telescopes to resolve their faint light.
The Andromeda Galaxy, our closest large galactic neighbor, is a popular target for beginner astronomers. Distant galaxies appear as faint smudges, but even with modest equipment, their existence hints at the immense scale of the cosmos. Studying galaxies provides insights into the universe’s evolution, structure, and the distribution of matter within it, revealing the grand architecture of space.
Star Clusters: Groups of Stars
Star clusters are gravitationally bound groups of stars, originating from the same molecular cloud. There are two main types: open clusters and globular clusters. Open clusters are relatively young, containing a few hundred to a few thousand stars, appearing loosely bound and often found in the galactic plane. Globular clusters, conversely, are ancient, densely packed spheres containing hundreds of thousands of stars.
Observing star clusters is a rewarding experience, revealing sparkling collections of stars against the dark background of space. The Pleiades (Seven Sisters) is a famous open cluster, easily visible to the naked eye. Globular clusters, like M13 in Hercules, appear as fuzzy balls of light through a telescope, showcasing the sheer number of stars contained within.

Advanced Techniques and Resources
Delve deeper into astrophotography, join astronomy clubs for shared knowledge, and explore online communities to enhance your stargazing expertise and passion.
Astrophotography: Capturing the Night Sky
Astrophotography elevates stargazing, allowing you to immortalize celestial beauty. Starting requires a tracking mount to counteract Earth’s rotation, crucial for long exposures. A DSLR or dedicated astronomy camera connects to your telescope, capturing faint light over minutes or even hours.
Image stacking software combines multiple exposures, reducing noise and revealing intricate details. Processing involves adjusting levels, curves, and color balance to enhance the final image. Consider a guiding system for pinpoint accuracy during extended exposures. Patience is key, as mastering astrophotography demands practice and dedication. Sharing your results with online communities provides valuable feedback and inspiration, fostering continuous learning and improvement in this rewarding pursuit.
Joining Astronomy Clubs
Astronomy clubs offer a fantastic pathway to deepen your stargazing experience. These communities provide a supportive environment for learning from experienced observers and sharing knowledge. Clubs often host observing sessions at dark sky locations, offering access to equipment you might not own, like larger telescopes.
Members can guide you through techniques for locating objects and using various instruments. Workshops and lectures cover topics from astrophotography to understanding celestial events. Beyond the technical aspects, clubs foster camaraderie and a shared passion for the cosmos. Finding a local club is easy through online directories; it’s a great way to expand your horizons and connect with fellow enthusiasts.
Online Resources and Communities
The internet is brimming with resources for stargazers of all levels. Websites like Sky & Telescope and Space.com provide news, articles, and observing guides. Numerous forums and online communities, such as Cloudy Nights, allow you to connect with other enthusiasts, ask questions, and share experiences.
YouTube channels dedicated to astronomy offer visual tutorials on telescope setup, object location, and astrophotography techniques. Stellarium and other planetarium software simulates the night sky from any location, aiding in planning observing sessions. These digital tools complement practical stargazing, enhancing your understanding and enjoyment of the universe.

Tips for Successful Stargazing
Maximize your viewing experience by seeking dark locations, allowing your eyes to adjust, and practicing patience for optimal celestial observations.
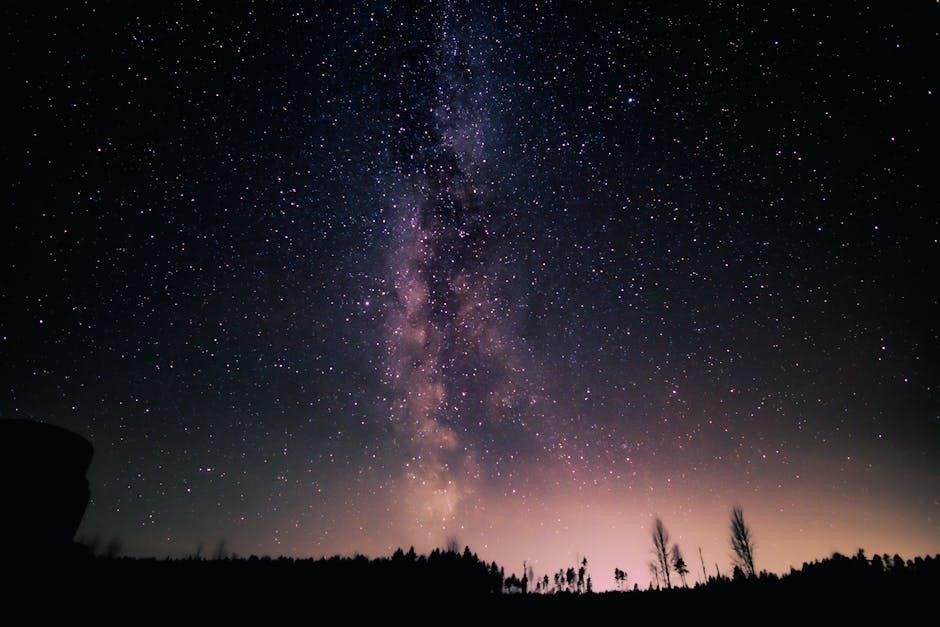
Dark Sky Locations
Finding truly dark skies is paramount for successful stargazing, dramatically enhancing visibility of faint celestial objects. Light pollution from cities obscures many wonders, washing out the delicate glow of nebulae and distant galaxies. Dedicated dark sky locations minimize this interference, revealing a breathtaking panorama of stars.
Resources like the International Dark-Sky Association (IDA) maintain a list of certified Dark Sky Parks and Sanctuaries worldwide, offering protected areas with exceptional nighttime viewing conditions. These locations often feature minimal artificial light, allowing for stunning views of the Milky Way and other deep-sky treasures. Consider traveling to these designated areas, or simply finding a spot away from urban centers, to fully appreciate the beauty of the night sky. Rural areas, remote mountains, and deserts are often excellent choices.
Dealing with Light Pollution
Even without access to a truly dark sky, strategies exist to mitigate the effects of light pollution. Utilizing a light pollution filter screwed onto your telescope’s eyepiece can block specific wavelengths of light emitted by common artificial sources, enhancing contrast and revealing fainter objects. Observing during moonless nights significantly reduces sky glow, providing darker conditions.
Shielding your eyes from direct light sources is crucial; use a red flashlight to preserve your night vision, as red light has less impact on dark adaptation. Position yourself strategically, utilizing buildings or trees to block unwanted light. Consider observing from areas with downward-facing lights, minimizing upward spill. Advocating for responsible outdoor lighting in your community can also contribute to reducing light pollution long-term.
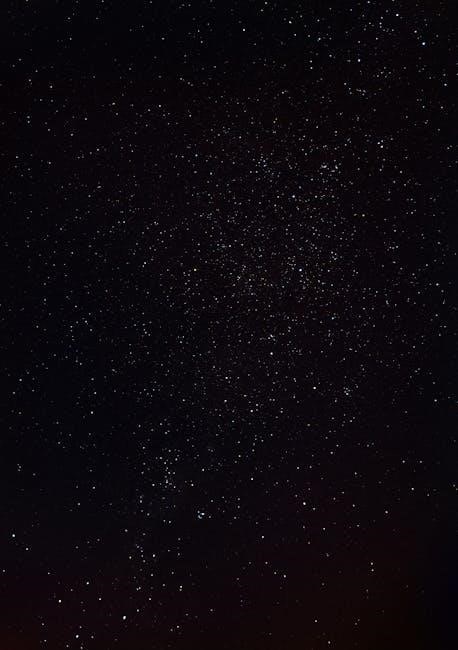
Patience and Observation Skills
Stargazing demands patience; the universe reveals its secrets gradually. Initial attempts to locate faint objects can be challenging, requiring persistent searching and careful scanning of the sky. Develop your observational skills by starting with brighter targets and gradually progressing to dimmer ones. Learn to discern subtle differences in brightness and color, and practice using averted vision – looking slightly to the side of an object – to detect faint details.
Detailed sketching of what you observe enhances your ability to notice subtle features and track changes over time. Consistent practice and a willingness to learn from each observing session are key to becoming a skilled stargazer, unlocking the beauty of the cosmos.